[ WALKTHROUGH ]
...Snake sneaks into Outer Heaven...
When it's time to infiltrate Outer Heaven's headquarter's,
the elite Fox Hound group calls on Agent Solid Snake. Fox Hound aren't
sure what Metal Gear is, but Snake's mission is to destroy it.
Two hundred kilometers north of Salzburg, deep in South Africa,
was a small country known as Outer Heaven. An armed fortress had been erected
deep in Outer hEaven teitory in the late 1990's by a mercenary both heroic
and insane. Within the fortress, was a weapon that had the power to change
the face of known warfare. Government orders were sent to the hi-tech Special
Forces squad, Fox Hound, to infiltrate the fortress. Fox Hound operative
Gray Fox was assigned to the mission known as "Intrude N313". Contact with
Gray Fox was lost a few days later, but not before receipt of a brief transmission
took place. The message simply read "...metal gear...". Government officials
ordered another operative to investigate, and a combatant codenamed "Solid
Snake" was sent into the fray. Snake successfully found Gray Fox, and also
learned that the Metal Gear was a nuclear-mounted heavy walking tank. After
rescuing Metal Gear's creator, Dr. Petrovich Madnar, Snake learned of Metal
Gear's weaknesses and finally how to destroy the machine. However, we learn
that in the end of the game, the leader of Fox Hound (known as Big Boss),
had been using Snake as a pawn for his own evil wrong doings. Ultimately,
a huge underground battle ensued between Snake and Big Boss, with Snake
walking away injured after the incident, leaving a dying Big Boss behind....
QUICK REFERENCE
Now for your convenience, here is a complete list of items in the game.
"1-1" means "building 1, floor 1" r=roof, b=basement
1. Weapons
Grenade Launcher - 1-3, top center, after the silencer (card 1 needed)
Baretta Hand Gun - 1-1, top center, leftmost truck
Mines - 1-1, top center
Plastic Explosives - 1-3, bottom (the open room)
Outdoors, in the top-left truck 1-2, top center (card 3 needed) 5-1,
top right (card 3 needed)
Remote-control Missiles - 1-3, lower left (card 2 needed)
Rocket Launcher - 2-2, right center (radio 120.48 here when at 4 stars)
Silencer - 1-3, top center (card 2 needed)
Submachine Gun - 1-1, right (card 2 needed)
----------------------------------------------------------------------------
The truck you enter to get arrested is in 1-1, lower right.
The room where your weapons are after you escape from jail: 4-1, center.
Hit the left wall and right wall, then go to the right.
----------------------------------------------------------------------------
2. Ammunition
1-2, top center (card 3 needed)
1-3, left side (no card needed)
1-r, left (no card needed)
2-1, lower left (card 4 needed)
2-1, top right, left door (gutter area)
2-2, lower left (no card needed)
outside, in the truck outside building 3
5-1, lower left (use Iron Glove)
----------------------------------------------------------------------------
3. Items
Antidote - 2-2, top right (card 6 needed)
Antenna - 4-1, center (card 2 needed)
Binoculars - jungle, look in the first truck
Body Armor - 4-1, center (card 2 needed)
Bomb Blast Suit - 4-1, right (card 2 needed)
Card 1 - jungle, top left truck
Card 2 - 1-3, bottom right (card 2 needed)
Card 3 - 4-1, center (card 2 needed)
Card 4 - Outdoors 1, right hand truck
Card 5 - 2-r, bottom left (card 4 needed)
Card 6 - 2-1, top center (card 5 needed)
Card 7 - 2-2, center, kill the two Arnolds
Card 8 - 2-1, top right, kill Coward the Duck
Cardboard Box - 1-3, top center (card 2 needed)
Compass - 2-2, top right, radio 120.48 when at 4 stars
Flashlight - 5-1, top left (no card needed)
Gas Mask - 1-1, middle (card 1 needed)
Infrared Goggles - 1-2, lower left (card 3 needed)
Iron Glove - 1-2, bottom center (card 1 needed)
Mine Detector - 1-r, bottom left (destroy the heat panel)
Oxygen Tank - 3-b, bottom center (card 7 needed)
NOW, HERE IS THE MORE DETAILED VERSION...
When you first start out, you'll have a ranking
of one star (ranking becomes important later on in the game, as you can't
finish the mission with less than four stars), and you'll have to walk
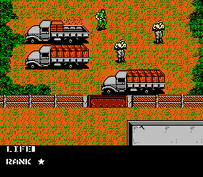
past the sleeping soldier and down past a few dogs and guards. You'll have
to keep travelling down as far as you can until you come to three trucks
being guarded by two stupid soldiers. Either take these fellas out barehanded
or sneak by, your choice.
*Go to the truck all the way on the left. Inside you'll find Card Key
#1.
*Now, go in the truck on the right.
The truck will take you to outside building #1, and if you stopped
off in the truck you find before getting card 1, then you'll now be equipped
with binoculars. These are not a very good item in my opinion, especially
after I kill the enemies in my screen and afterwards use the binoculars.
After I unequip the binoculars, I find the men I killed have regenerated!
This sux, so don't use these much.
*There will be two trucks in front of building 1. The one on the left
has a ration in it. Most useful. The other one (on the right) takes you
somewhere else, so just ignore it for now.
*Go in building #1 with card key 1 equipped.
INSIDE BUILDING # 1
Your now inside a parking area for military equipment. Jeeps and tanks
surround you, making it easy for you to sneak around. First thing you want
to do is go one screen up from where you first come in. There's a room
there with a gas mask.
* First thing you want to do is go one screen up from where you first
come in. There's a room there with a gas mask.
*Go up two screens and you'll find a guy standing in front of the elevator.
Go right one screen.
*In the first truck you come to will be a handgun. The truck beyond
that is full of nothing but the enemy. The last truck in the row has mines
in it. You'll need these to destroy the tank later.
*Go back to the elevator and go up.
The second floor elevator area is monitored by cameras. So...being
careful of these, go down one screen.
*go in the room on the left.
*Get some ammo in the room and proceed down.
You'll find a P.O.W. as soon as you enter this room. Do NOT shoot him.
Shooting him will ultimately sacrifice the mission and you will not be
able to win. After talking to him, go left.
*Put on your gasmask and get out of there!
*Once out of that room, go to the bottom left door and use your card
to get in. You'll find another P.O.W. Talk to the fool, then leave.
*Once done talking to the P.O.W., go right as far as you can, until
you see two doors.
*Go in the door on the right, which holds keycard #2, then go in the
room on the left.
Next, you'll need to go up one screen, and that's a dead end because
of an electric floor.
*To get the missiles to destroy the control panel (the little purple
thing on the other side of the electric floor), you'll have to go back
all the way to the left, and enter in the top left door. Big Boss yammers
something on your transceiver about calling Schneider, who's frequency
is 120.16, but Big Boss is sick in the head or something, cause you can't
talk to Schneider for some reason.
*Head back and destroy the control panel w/remote controlled missiles.
(Did I have to tell you all this? It's fairly simple. Just trying to make
it idiot-proof, though.)
From the electric floor area, go up a screen and go in the door on
the right. *Talk to the P.O.W., leave the room and go up.
*Don't go in the elevator, instead, go left and in the door in the upper
part of the room. You get to play with a cardboard box now (It's main use
will be using it to go to the jail later.)
*Next, get out of the room where the cardboard box is and go in the
door on the left.
*Go into the room in the middle. A silencer is there, and from there
go into the room on the right where the grenade launcher is. (Damn, your
on a roll)
Your handgun is now silenced and guards won't be leaping at you every
time you shoot something.
*Go back to the elevator. Go all the way down.
*Once out of the elevator, go down one screen and pay a visit to the
P.O.W. in the cell on the left.
*Leave his cell and go down again.
*There's rooms on both sides of this corridor, go in both. The left
room is another P.O.W. The room on the right is the holding place for the
machine gun.
Go down one more screen and you'll find a dead-end with a solitary
soldier guarding a truck. Why would he be guarding this? This is a place
that took me forever to figure out, so this is what you do-
*If you listened to that last P.O.W., he tells you the way to get to
Grey Fox is to get captured on purpose. How to do this is another thing.
Go in the truck that the one soldier is guarding and get in your cardboard
box. Walk around inside the truck for a second, and you'll find a surprise.
Do not pass go, do not collect $200; you go directly to jail!
JAIL
,
Code to get to Jail with following items: Machine gun, 5 mines, grenade
launcher, 5 plastic explosives, the silencer, 3 missiles and a two star
ranking-
31ZQF 14F11 Y6641 Y1116 NKCK1
They cuffed you and stuffed you and now Big Boss sounds actually happy.
What a weird man, huh?
*Punch the wall on the left and it'll open a door.
*You'll find not any ordinary P.O.W. there, but the missing Grey Fox!
He talks about Metal Gear some and it's creator, Dr. Pettrovich.
*Punch the lower wall and you'll open another secret door.
Your in building #4 now. You don't have access to the door in the upper
part of the screen, so go right. A guy in a white suit of some sort proclaiming
his name as the Shotgunner challenges you. But you have no weapons!
*Go in the room on the bottom right. You'll get all your equipment
back.
* After defeating the Shotgunner, go in the door on the bottom left.
* Grab card key #3, and exit through the door on your right where you
fought Shotgunner.
(Note: Since being locked up in Outer Heaven's prison, they have hidden
a transmitter in your equipment. Get rid of this immediately by going into
your equipment and selecting the transmitter, as this will give your position
away to the enemy if you do not.)
* Go in the bottom door after killing the dog. Inside is the Body Armor.
* Go right and go in the top door. Here you will find a Bomb-Blast
Suit which is good against explosions and air blasts...
* Go down next and left past the first door, till you come to another
door. Inside that room is the Enemy Uniform. (Try calling Big Boss after
acquiring the Uniform...what a loon!)
* Exit the building by going in the door on the right.
You are outside again, and just go right until you come to a truck.
Don't go up, or you'll risk being blown up with mines. You'll need a mine
detector to get past them, but you don't have it now....sooooo...
*Go down instead. You'll see four trucks.
*Truck closest to left has plastic explosives.
*Middle truck will take you somewhere else, so don't get in.
*Truck closest to right has card key #4.
*Go inside door to the left.
Inside Building 1 for the second time...
Your back inside building 1 again. This time your going to enter all
the doors you didn't have access to before.
*Door on the left brings you to some trucks, where you can get more
mines. Not much else except for an elevator here. Instead, go right and
go in the elevator.
*Go one floor up.
*Go straight down. Hurry past the infrared beams (guards will be too
slow to catch you if you don't stop.)
*Hang a left and you'll find doors that you couldn't get into before.
Go in 'em for the love of Solid Snake!
*Beat the Machine-gun Kid (What a wuss)
*Go in the upper door and you'll get the Iron Glove. I still haven't
found a use for this thing.
*Taking a left now, kill the guard patrolling the electric floor.
*The room he's guarding has one of the coolest items in the game! The
Infrared Goggles!
*Let's see what's up above now. Go up from the electric floor.
*By the time your done here, you'll have a 3-star ranking, and have
15 mines, enough to destroy the tank guarding building #2.
*Keep going up and circle around till you get to the elevator.
*Go up to the roof, slap on your Bomb-Blast Suit and go through the
air blaster.
Your on the roof now, the place where the Outer Heaven renegades have
reportedly stashed Dr. Petrovich Madnar.
*Swing a left and go all the way to right as far as you can and go
down.
*After screwing around a bit, finding some ammo and a P.O.W., go right
again and down onto the shaky bridge.
*Crossing the bridge, you'll find to your left is an electrified floor.
Get past it and the guards, and your reward is the Mine Detector. Now you
can get past the minefield to destroy the tank guarding building 2! But
not yet, you still have some unfinished business to your right regarding
Dr. Petrovich.
*You'll see two Heavy Artillery units guarding two doors. Run all the
way to the right and safely up away from their shots. Now, using the Grenade
Launcher, shoot at them from the side, where they can't hit you. It takes
10 grenades for each Artillery unit.
Having learned some valuable information about Petrovich, you must now
go to Building 2. But...you still have to wade through a mine field and
take out a seriously big tank...
*Having found the minefield, make sure to use your mine detector. Have
at LEAST 12 mines, for this is the minimum amount used to destroy the tank.
The misuse of just one mine will mean going all the way back inside Building
1 to fetch some more.
The enormous tank stands in the way menacingly, showing you more firepower
than you can handle. It's up to Solid Snake, the world's most unknown operative
to destroy it single-handedly to ensure the demise of the Metal Gear and
Outer Heaven's plan.
* Make sure to go in the truck just before the minefield and stock
up on rations.
* Now, standing in front of you is the tank. Go to the side (either
side), where it cannot shoot you. Time it down perfectly so that you can
run out between it's shots and set a mine in a place where it will be sure
to run over it. Repeat until the tank is destroyed.
*Proceed up (watch the mines) and you'll see a building with some guards
standing around the entrance. Use your Enemy Uniform to enter.
Inside Building 2.
Your in building 2 now. Many surprises and challenges await you just
ahead, like one-way-only elevators and moats. Some of the most difficult
parts of your mission are in this building. When you first enter, there
are three doors.
*Door on the left holds ammo, and door in the middle is the passageway
to the rest of the building. Door on the right holds rations, but you need
card key #5 to access it. A nice little security feature awaits you in
the middle door, blocking the way. Destroy it quickly as possible with
the Grenade Launcher or it will crush you.
*Once past the terrible machine, you'll go through the door and find
more infrared sensors. Use your goggles and time it wisely to pass without
setting the alarm.
*Swing a right and go down, into the moat, and into the room on the
left. Inside is the Antenna which unblocks the transceiver's transmissions.
*Might as well go back up, cause the room with the Antenna is the only
room you have access to right now. Never hurts to explore though...
*Go back to the room with the infrared sensors and go in the elevator.
Go to the roof, because you don't yet have access to any of the doors on
the second floor.
*Talk to the hostage in the door on the left as soon as you get out
of the elevator. Go right and down. Kill the white suited guard positioned
in front of the door. Go inside and you'll find card key #5. You can now
go into most doors on the first and second floors.
*Go down to the first floor again and inspect any rooms you didn't
have access to before. On the way down, make sure you avoid the pit-trap
in the room with the crates. It's all the way to the right. We wouldn't
want to start from the beginning of Building 2, would we?
*Make sure and remember to go to the door you access by the shallow
part of the moat. It holds card key #6.
*Go to elevator again and go up one floor.
*Take a right and go in the door on the bottom. Quickly get out of
Arnold's way and continue going down. Go through the door on the bottom
left using card key #1 before Arnold attacks you.
*Take a left and visit the room without a door. This has three cases
of ammo.
*Going up, enter the room which holds a man in the center, tied up...
Dr. Petrovich? Hardly. It's a trap, look out! He wants to lure you into
the middle by posing as Dr. Petrovich to talk to him, cause there's a pit
right underneath him! Don't fall for it!
*Go back out of the room, and back to where the Arnold twins were.
*Go in the door on the lower right with card key #5. The door on the
left in this room holds a P.O.W. After talking to him, you'll get your
four star ranking!
*Now, go back to the room with the Arnolds and go in the door on the
right. Go in the door on the left first and talk to the P.O.W. He'll tell
you to contact Jennifer on frequency 120.48. Now that you've got four stars,
this is what the P.O.W. means by "class".
*Go over to the door on the right, but don't go in. Providing that
you DO have a four-star ranking, call Jennifer while standing outside the
door. Then go inside, grab the Rocket Launcher.
*Once again, go back to Arnolds' room and kill them both with the Rocket
Launcher. It's strange though. In my game, once I get the Rocket Launcher,
I don't have any ammo for it. But as soon as I find some Bullets for my
gun, it replenishes the Rockets and gives me thirty of them. Strange...
*Killing the Arnolds gives you card key #7.
*Go in the door on the upper right after the twin Arnold's cease to
exist.
*At the end of this hall is a door that should have the compass. Call
Jennifer again outside the door, then go inside and sure enough the compass
will be there.
*The door on the upper left part of the screen (While your outside
the room that holds the compass) Holds the antidote, which cures scorpion
bites. (Scorpions!? What Scorpions?! You'll find out...)
*Now that you've got the compass, go outside by using the top door
on the first floor after you cross the moat.
In the Desert, en route to Oxygen Tank and Final Building
*Once in the desert, equip the compass and walk straight ahead (up).
There is a maze off to your left, but go straight right now until you reach
a
building. Go inside.
*Kill the troops, and do not go in the door on the left like Big Boss
says. It's a pitfall. Instead, go up. Watch out, because there's pitfalls
here. If one starts to open, quickly press the select button, then, once
you go out of your options list again, the pit will be closed again. There
are two pits to look out for before you reach the elevator.
*Go all the way down into the 100th floor basement and, being aware
of the laser-cameras, enter the door on the bottom wall. It contains the
Oxygen Tank.
*Exit the building and go back down into the maze.
*After going left one screen, Go left bottom, left bottom, up, left
bottom. A little change in the music lets you know you did this correctly.
Now you see Building 5 come into view. This is where they took the Doctor
too, right?
Inside Building 5 for the rendezvous with the real Petrovich
*Schneider contacts you in this building and tells you about gas-rooms
being up ahead, so donning your gasmask explore this whole area. This is
where I had the hardest time in the game. Finding Dr. Petrovich is literally
a pain in the ass, and as of the year 2000, this is the first time I've
ever found him and completed the game without cheating. Wanna know where
he is? Too bad! No, just kidding. From the first room in Building 5, go
up through the top door, then all way to the end of the hall and take a
left. There is a room without a door which holds the flashlight, but this
isn't the place where the elusive Dr. Petrovich is. Instead, on the left
wall, opposite of the flashlight room, there is a hidden door.
*Punch the left wall until you unveil a hidden room.
*Inside is the Flame Trooper. Stand against the top wall and, using
your grenade launcher, nail the sucker.
*Enter the room.
A talk with the elusive creator of the Metal Gear, Dr. Petrovich Madnar
*Talking to the doctor, you learn his daughter Ellen is being held captive
also, and Petrovich refuses to talk to you without Ellen being rescued.
*Go back to the first room you saw in this building and go into the
door on the right.
*There is a hidden passageway on the top wall. Punch it and go through.
*Follow the maze of walls, until you come to the screen where you can
see the door you came into the maze from (the one just above with the hidden
door). There is another hidden door here, on the left wall. Punch it and
go through.
*You'll eventually come to a totally dark room. Use your flashlight
to see. CAREFUL! This place is chock full o' pitfalls! One wrong step could
send you to your death! (Note: Use the select button trick to prematurely
stop the pitfalls)
*If you got through the pitfall part, you'll know that is one of the
scariest parts of the game. Very exciting. Anyways, go all the way down,
and you'll find a door. Go through it, and it appears to be empty. Not
so.
*Go to the right wall, and punch it. It is also a hidden door. Go inside
and you'll find Ellen.
*Get back to Dr. Pettrovich. You can go back through the pitfall area
(not recommended) oooooor, go down from Ellen's cell and into the door
on the bottom wall. You'll end up in Building #4, the place where you defeated
the Shotgunner. Exit this building and go right.
*You'll find yourself in the lower maze. Go right.
*Go down until you find three trucks. Enter the middle one.
*You'll end up at another three trucks. Get into the one all the way
to the left.
*You'll end up outside Building 1. Get in the truck all the way to
the right again.
*Walah! Your outside Building #3. Now, go down and go through the maze
again to get to Building 5. Go talk to Pettrovich.
*He'll tell you that you need to go to the 100th floor basement of
Building 3 and destroy the supercomputer that controls all Metal Gear's
functions. You'll need 16 plastic explosive to finish it off. Now, you
need card key #8, so go to Building 2 by going down and crossing the desert.
Inside Building 2 again....
*Once inside Building 2 again, go into the moat.
*Use the Oxygen Tank and go up through the deeper part.
*When you get to the top, destroy the electric floor panel controls
with a missile. The door on the left holds ammo, while the door on the
right appears to be a hostage situation.
*A guy calling himself Coward the Duck has hostages. Jennifer calls
you and tells you her brother is one of the hostages and will not help
you if he dies. You cannot get card key #8 if he dies.
*Simply walking on the outskirts of one of the walls (there is a pit
trap in the middle), walk right up to Coward the Duck and shoot him a few
times with your pistol, making sure not to kill any P.O.W.'s.
*Jennifer's brother tells you to use the elevator on the left when
you make your final getaway.
*Grab card key #8, and return to Building 3.
Inside Building #3: The Final Mission
*Go into the 100th floor basement.
*In the 100th floor basement, go into the door on the right and talk
to the P.O.W. He has some important news to tell you.
*After talking with the P.O.W., go left and enter the door at the top.
Big Boss tries to cancel the mission, but for what reason? (the P.O.W.
knows)
*You'll come eventually to an electrified floor. But what's this? No
control panel to destroy? Hope you have a lot of rations, cause you'll
just have to take some pain.
*Inside the room, you'll find the supercomputer...the machine responsible
for running all of Metal Gear's functionings.
*Destroy the evil device with Plastic Explosives.
*Once the supercomputer has been destroyed, the Outer Heaven self-destruct
program kicks in, and you have a limited amount of time to escape before
being blown to smithereens.
*Exit the right by the door on the right.
-That's it, Metal Gear is useless and Outer Heaven is about to collapse.
As you exit the Outer Heaven infrastructure, someone yells out at you.
It's Big Boss! He tells you his sinister plot to use you and challenges
you to a fight to the death while Outer Heaven is moments away from total
annihilation.
*Defeat Big Boss using Rockets. He's fast, but your smarter.
*Use the elevator on the left after Big Boss is defeated. Keep going
up until Snake emerges into the glowing pre-dawn of South Africa.
"This is Solid Snake. The Metal Gear has been destroyed Operation "Intrude
N313" is a success. It's all over-- everthing, at last!
Solid Snake returning to base. Over."
--------------------------------------------------------------------------------
|